Say goodbye to the hassle! This guide will walk you through how to easily install an eSIM with detailed steps and clear illustrations. Perfect for new users or anyone preparing for a trip, you’ll be ready to get online the moment you arrive in a new country.
Step 1: Go to Settings and select “Mobile Data”.
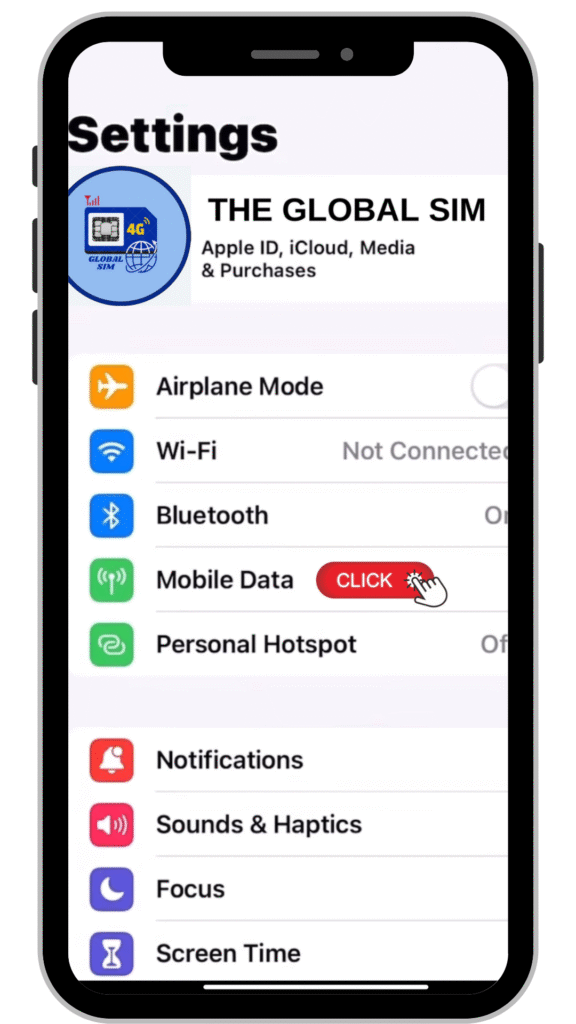
To get started, go to Settings on your phone, then tap on Mobile Data (the name might vary slightly depending on your phone model).
Step 2: Turn on Mobile Data and select “Add Data Plan”.
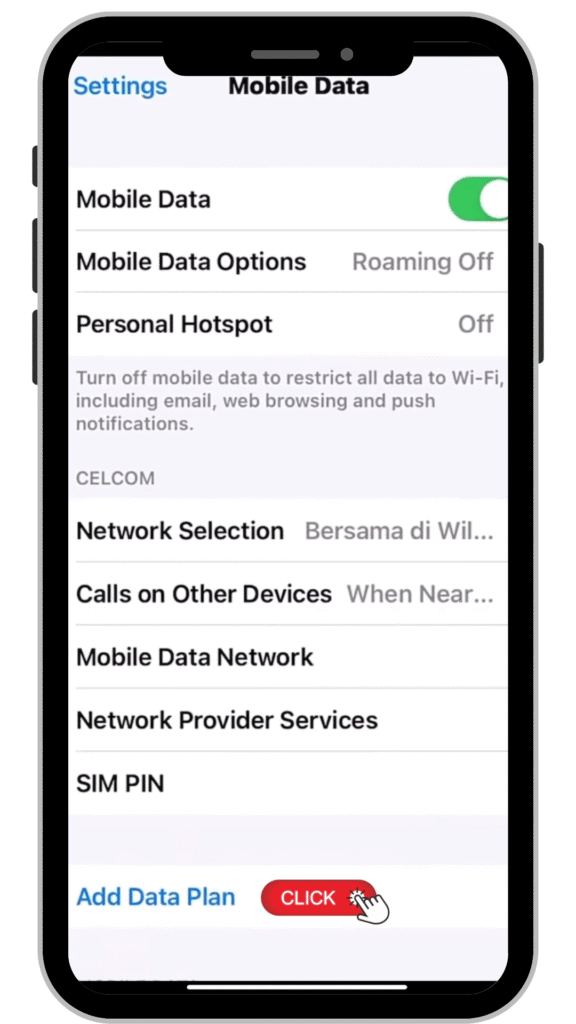
First, switch Mobile Data to “ON.” Then, scroll down to the bottom and select Add Data Plan to add your new eSIM.
Step 3: Get ready to add the data plan.
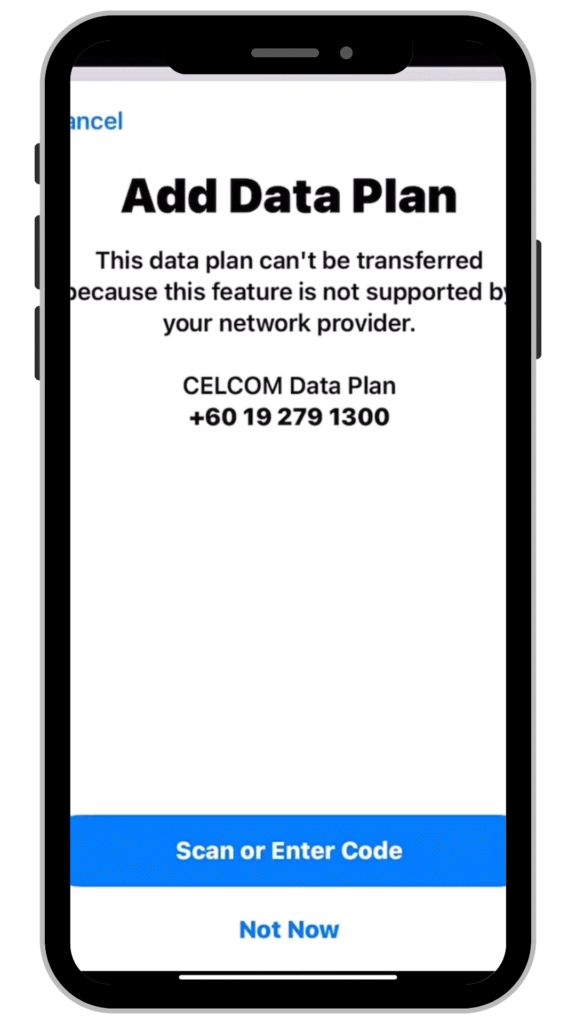
The system will show you a warning about the limitations of transferring data plans from some networks (if any). You can then select Scan or Enter Code to scan the QR code you received from your eSIM provider.
Step 4: Scan the QR Code
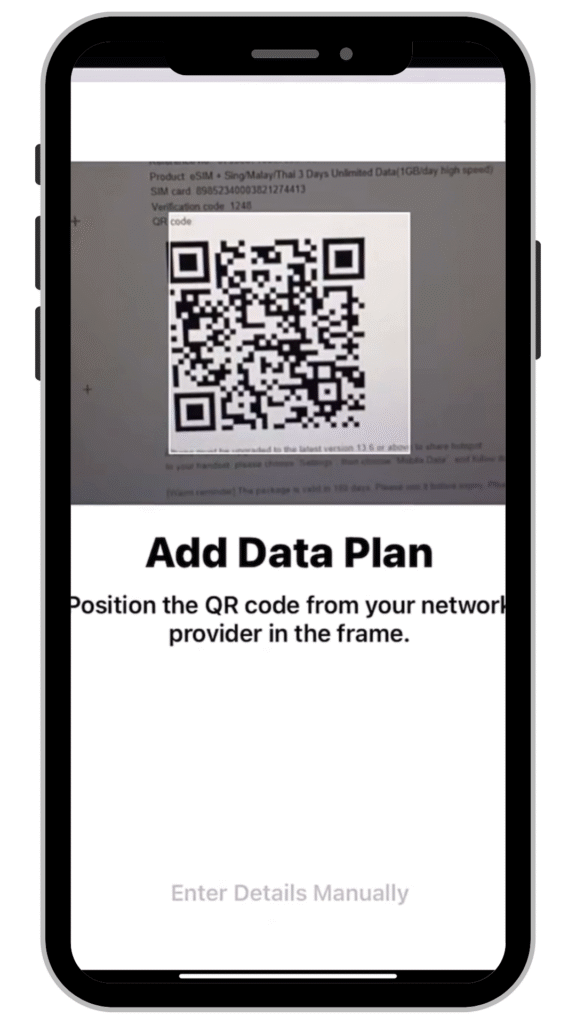
Use your phone’s camera to scan the eSIM’s QR code that you received. Make sure the code is within the frame so the system can recognize your data plan.
Step 5: Confirm the Data Plan
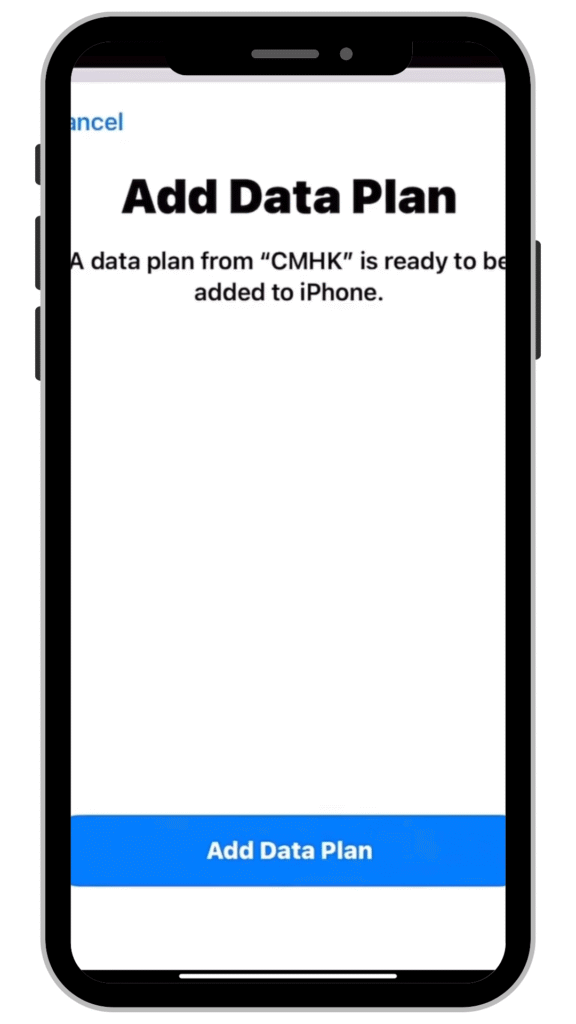
After scanning the QR code, the system will notify you that your data plan is ready. Tap Add Data Plan to confirm and install it.
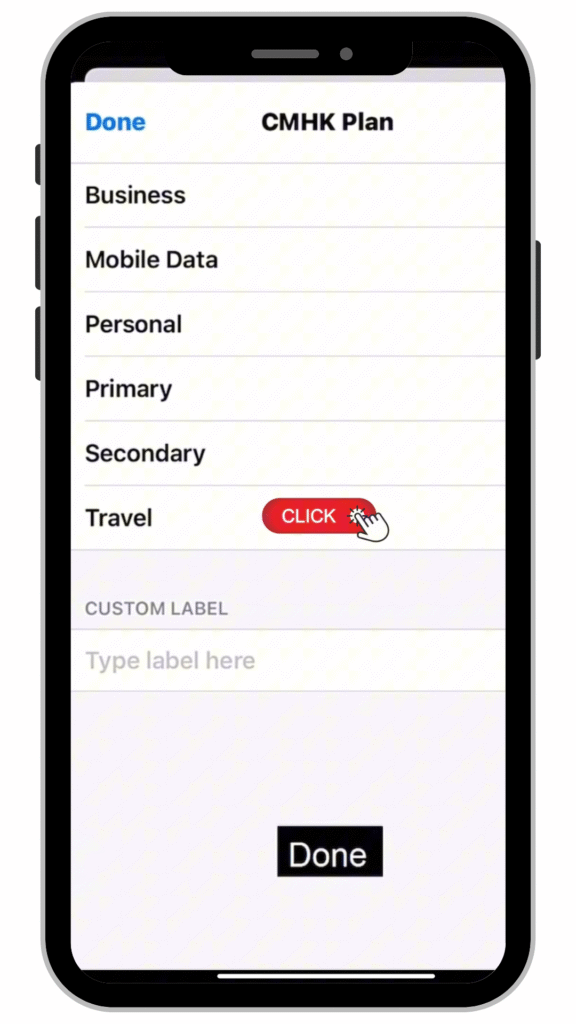
You can name the data plan whatever you like, such as “Travel,” to distinguish it from your main plan. Then, set it as the default data plan for your trip. Once you’re finished, tap Done.
In just six simple steps, your eSIM is installed and ready to go!
After completing the installation, here are 6 simple steps to activate your eSIM. You’ll be connected to the internet instantly, no matter where you are in the world. Even if you’re a complete beginner, you can definitely follow these steps.
⚠️ You can only perform these steps once you’ve arrived at your destination.
Step 1: Go to Settings and Select “Mobile Data”
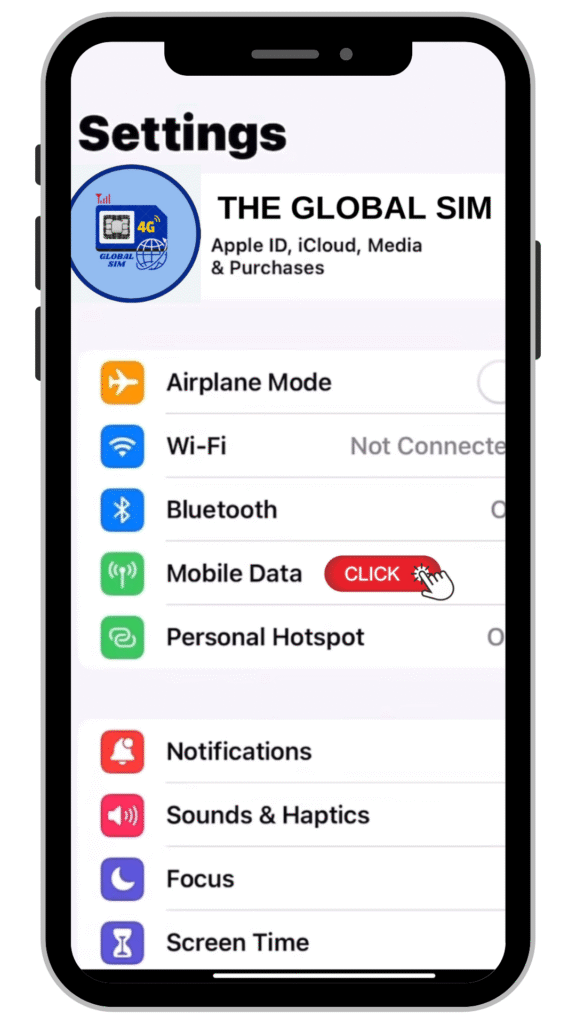
Start by going to the Settings menu on your phone, then tap on Mobile Data (or Cellular Data) to manage the SIMs on your device.
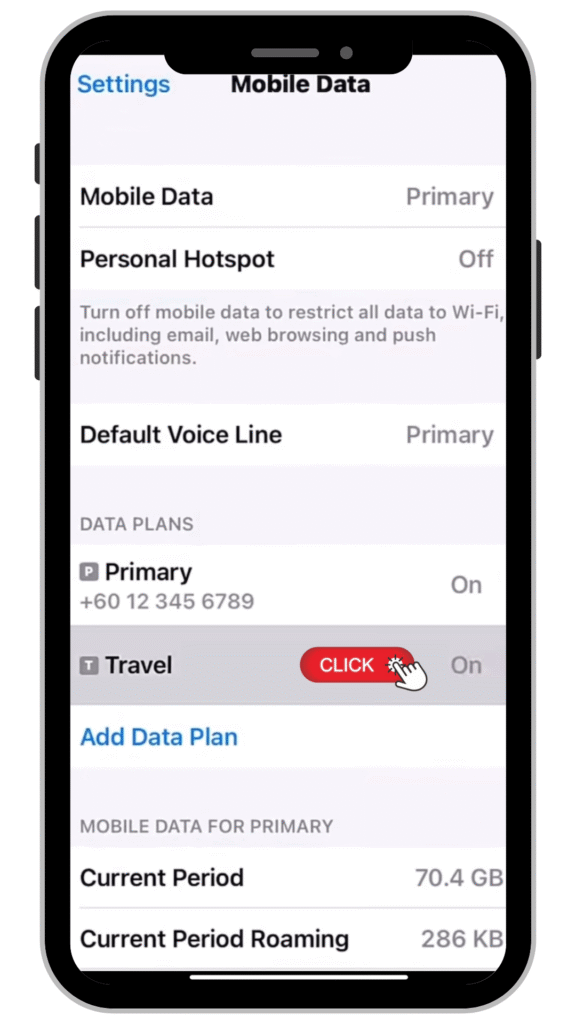
Step 2: Select the eSIM You Added
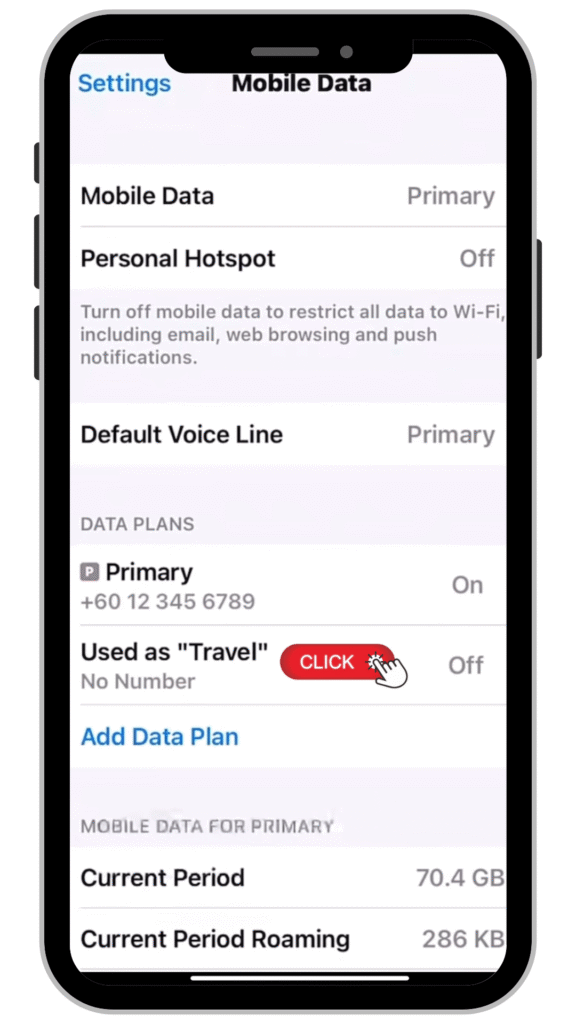
The system will display the eSIMs that have already been installed (for example, “Travel”). Tap on the name of the eSIM profile you want to use to go to its specific settings page.
Step 3: Tap “Turn On This Line” to Activate the eSIM
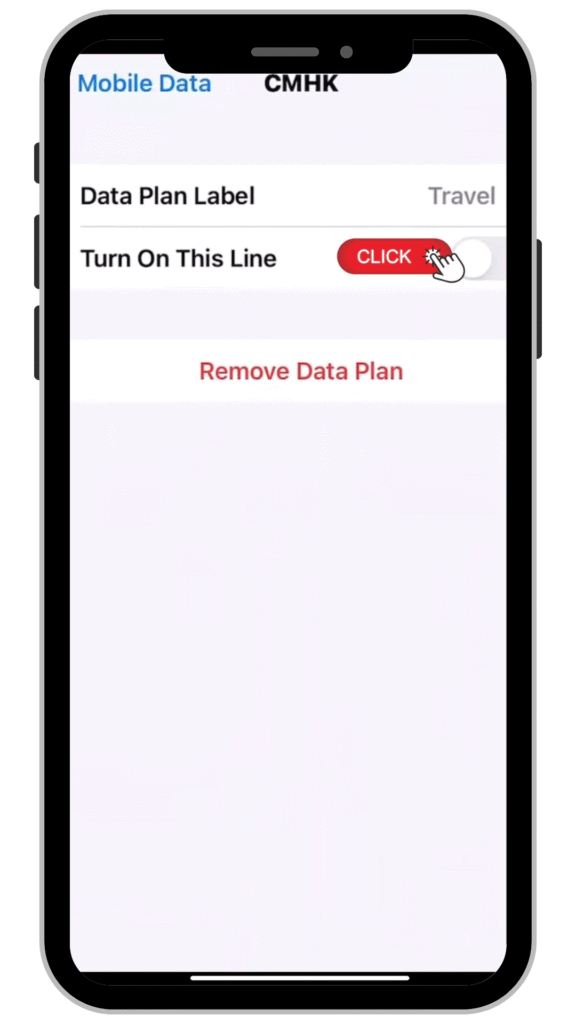
Move the “Turn On This Line” switch to the ON position to activate this eSIM. Your phone will then begin searching for a signal from the local network.
Step 4: Go to the Desired eSIM Page
Go back to the Mobile Data page and select the eSIM package you want to use.
Step 5: Turn on “Data Roaming”
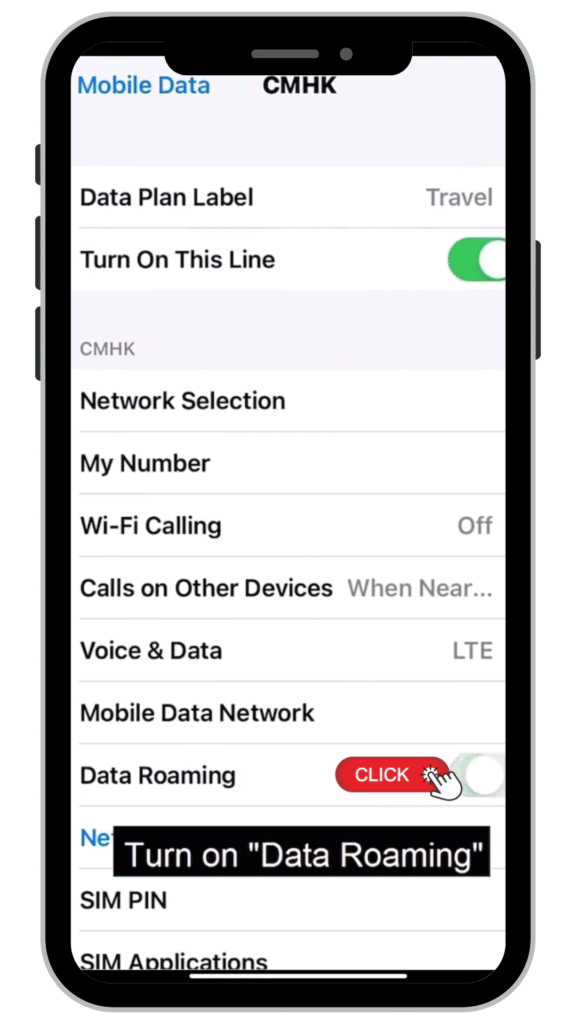
Go to your eSIM profile page, scroll down, and switch on the Data Roaming toggle. This will allow your phone to use the internet when you’re abroad.
Step 6: Set the eSIM as the Primary SIM
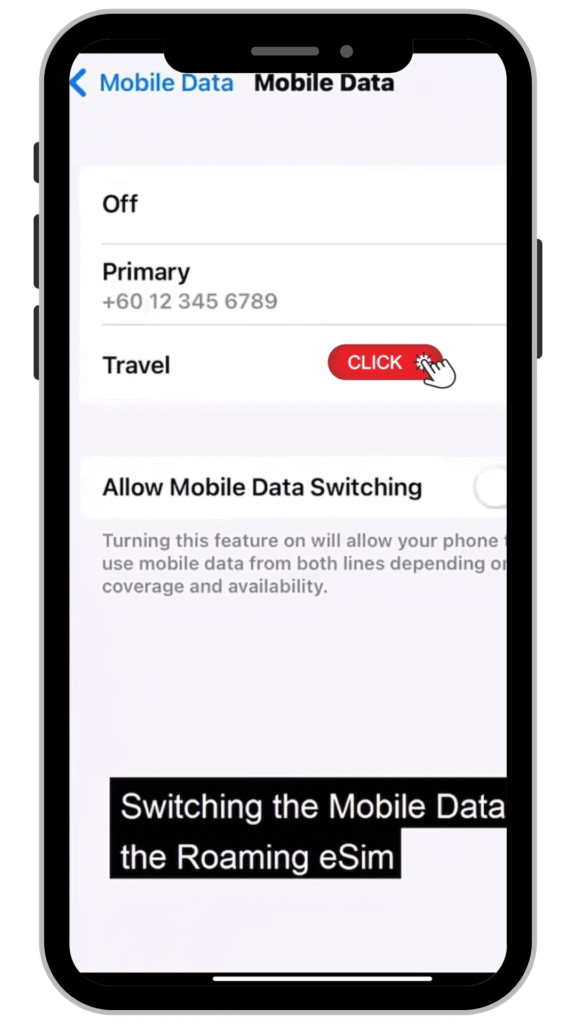
Go back to the Mobile Data (or Cellular Data) page. Choose the eSIM package you want to use, such as “Travel,” to be your primary SIM for internet connectivity. This will prevent your phone from using your main SIM and help you avoid international roaming charges.
Installing and activating an eSIM is not as complicated as it seems. Just follow the steps above, and you’ll be ready to go. No need to change SIM cards or wait for delivery; if you have a phone that supports eSIM, you can easily use the internet abroad as soon as you arrive.
If you’re ready to start using an eSIM today, you can view packages and place an order at https://theglobal-sim.com/simcard/?product_tag_1=esim&wpf_fbv=1. The QR code will be sent to your email immediately.